How to setup FileChimp Sync Folders
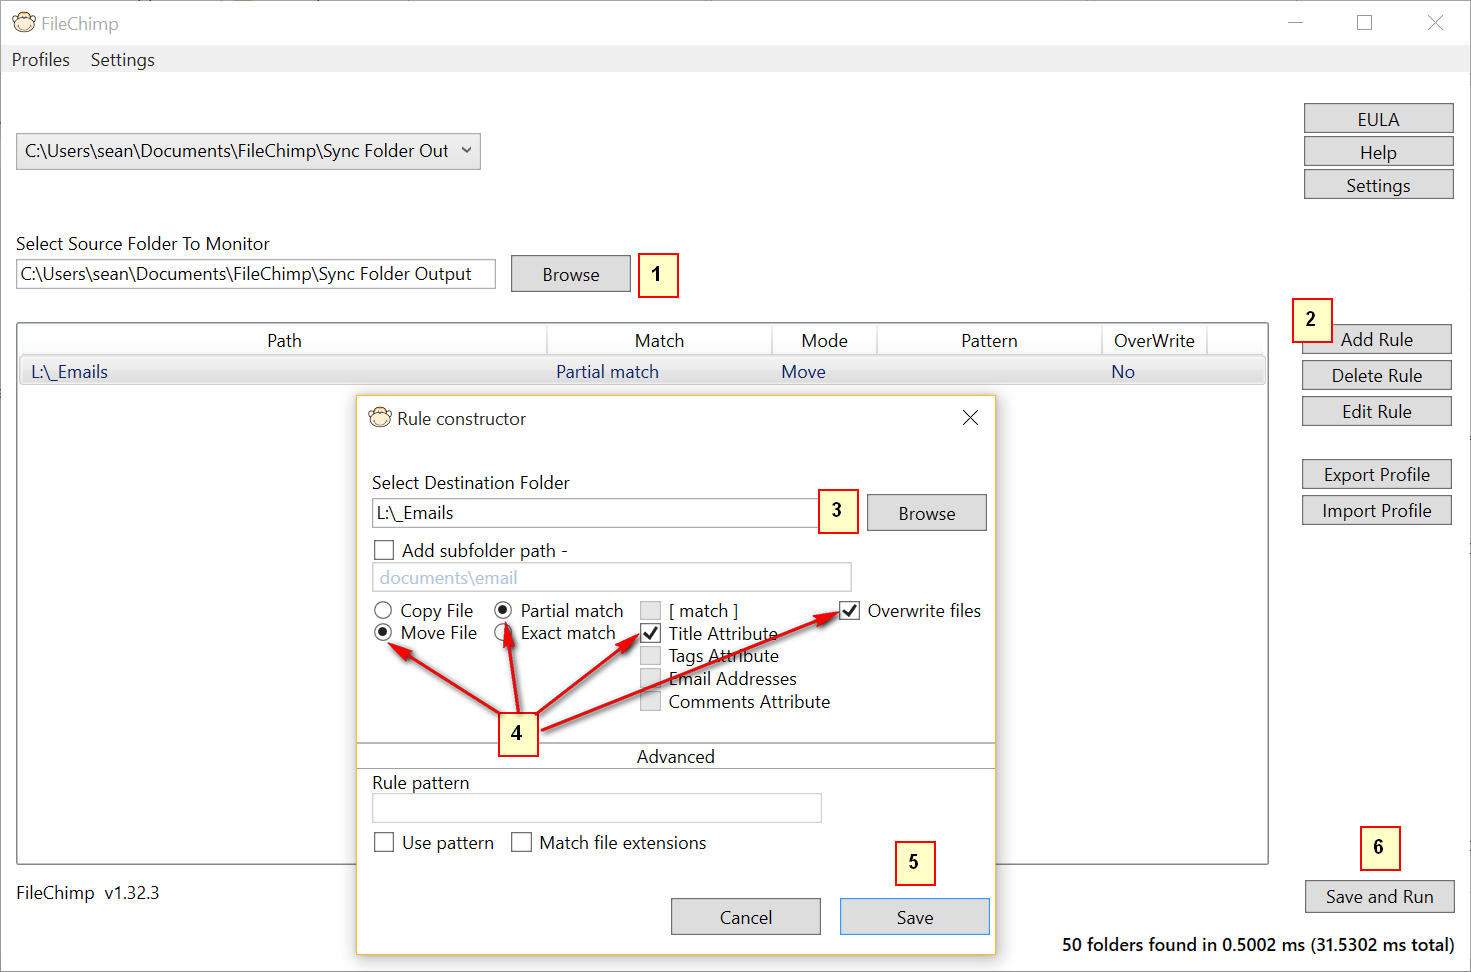
To get up and running with FileChimp Sync folders you need to first configure a single rule in the FileChimp application. From the taskbar open the fileChimp application and follow the steps below to create a basic rule.
1. Browse to select the source folder (the default location will be in your documents folder under FileChimp)
2. Select Add Rule
3. Browse to select a destination path (normally your network drive that contains all of your project / client folders)
4. Set some basic options as per the image below to - Move File; Partial match; Title Attribute; Overwrite Files
5. Save the rule
6. Save and Run the selected rules to complete the application setup.
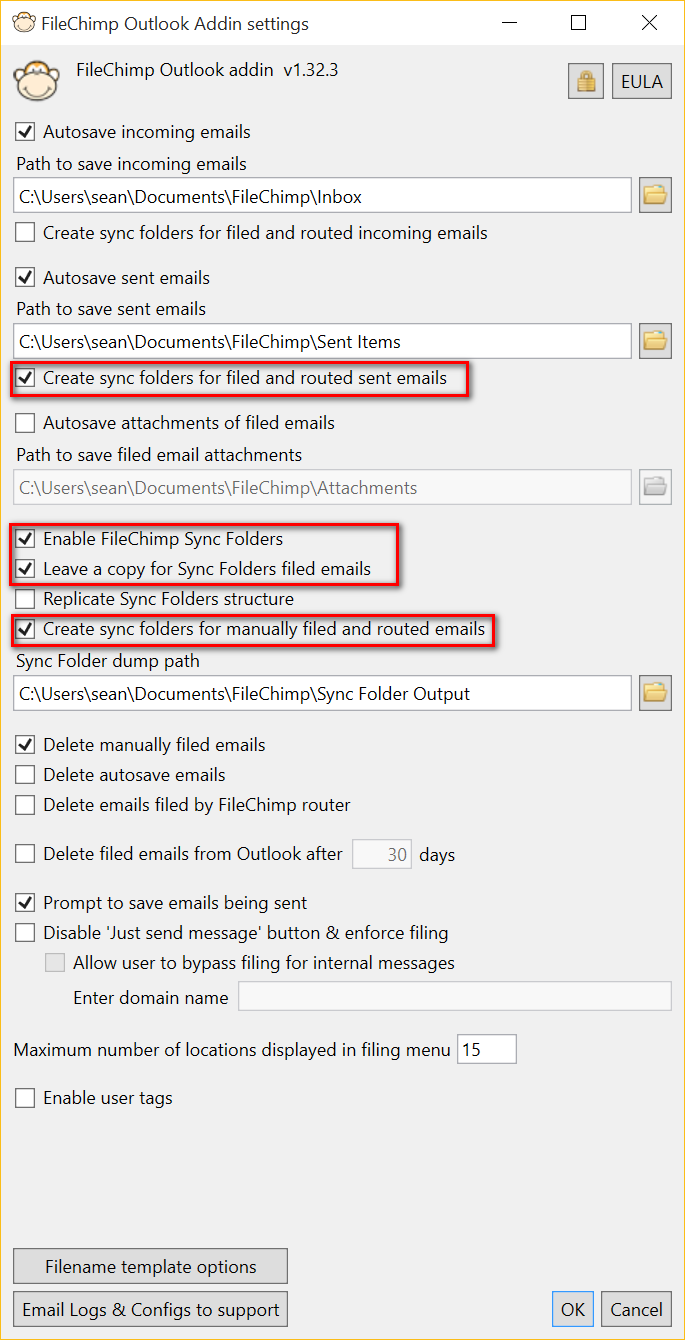
7. Return to the Outlook addin settings and enable 'FileChimp Sync Folders'
8. We recommend setting some additional settings in outlook for best results (see Outlook settings below)
Setup FileChimp sync folders for Outlook